Thursday, December 15, 2011

New Favorite Soup!

I have discovered a love for this soup: Italian Chicken Soup

It is perfect- soupy, but hearty with the noodles and chicken and veggies. I particularly love that it has jalapenos in it because it gives it a tiny kick, but not too overpowering. We put parmesan cheese over the top, and mixed it all in so it was delicious and cheesy! Also, I just used half and half instead of cream, and I used canned diced tomatoes instead of whole ones. I love the little round pastas (I just found a small macaroni noodle pasta that wasn't curvy like normal macaroni).

Anyway, here is the recipe and her picture (I didn't take a picture of mine :( but it looked just like hers!)


Italian Chicken Soup
1 box Ditalini pasta {I used the Barilla brand}
1 tbsp. olive oil
4 chicken breasts
8 cups chicken broth {this equals out to two big boxes of chicken broth}
1 medium onion, diced
2 green peppers, diced
2 stalks of celery, diced
2 fresh jalapenos, diced
1 tbsp. olive oil
1 can {28. oz} whole tomatoes, diced
2 cups heavy cream
1/3 cup olive oil
4 tbsp. minced fresh oregano
salt & pepper, to taste
Parmesan Cheese shavings, as desired

Sunday, November 6, 2011

Sweet Potato Chicken Chili

Finally I made something! Well, I make food all of the time but this time it's something worth posting!

Sweet Potato Chicken Chili

Serves 5 and is supposedly fat burning. Woo hoo!

INGREDIENTS

1 can kidney beans, rinsed and drained

1 pound sweet potatoes, peeled and cubed

2 cloves garlic, minced

5 oz yellow onion, diced

1 ½ cups reduced-sodium chicken broth

10 oz precooked chicken breast

2 tsp Worcestershire sauce

2 tsp ground cumin

1 tbsp chili powder

1/8 tsp chipotle chili powder (to taste)

1 cup fresh or frozen corn


DIRECTIONS

1. Preheat oven to 350 degrees

2. Peel and dice sweet potatoes. Coat and toss cubed sweet potatoes with cooking spray. Spread evenly on a cookie sheet and bake for 25 minutes or until potatoes are tender. Remove pan from oven and let cool.

3. Coat large pan with cooking spray and heat over medium flame. Thinly slice onion and add to pan. Sauté onions until they are tender and start to brown. Add garlic and all seasonings. Cook for three minutes or until the mixture becomes fragrant.

4. Rinse and drain kidney beans. Pour about half of kidney beans in the blender and puree until smooth.

5. Add remaining ingredients to pan. Heat to near boiling, stirring often. Reduce heat to low and simmer while covered for 30 minutes.


NUTRITION FACTS (per serving)

Calories 251, Fat 2g, Saturated fat 0g, Cholesterol 52 mg, Sodium 627 mg, Carbohydrates 37g, Dietary fiber 7g, Sugars 7g, Protein 20g.


What I actually did (with my roommate's help) was add everything into the crock pot. Except we bake the sweet potato chunks, then added them in and cooked it for a half hour or so. We made it for my other roommates and my home teachers. As you can see, every one was excited to eat it!

It was so tasty (if I do say so myself) with the spices and the sweetness of the sweet potato. If you don't like sweet potatoes though, you can substitute them for regular ones. It just won't be as good in my opinion. :)

It's super easy and super tasty so try it!

Wednesday, November 2, 2011

Halloween Mini-Cupcakes!

I might have been a bit ambitious with these halloween cupcakes. I wanted mini cupcakes for sure- because they are so darling and then I can give most of them away! But 60 mini cupcakes....it was a little overwhelming. Plus I only have one mini cupcake pan so it was 5 batches in the oven! But I loved how they turned out. The pumpkins were my favorite- SO easy! The mummies were great too- I wish I had m&ms for the eyes, but I used chocolate chips. And last, the spiderwebs. I love the green...but I didn't have black and so my webs came out a weird grey/brown/icky color. Plus the green frosting got pretty hard before I did the spiderwebs, so they are kind of off looking. But overall, a fun experience, and delicious! Oh- did I mention I put zucchini in them? Healthy!...kind of. :)


Friday, October 28, 2011

Lesson Learned: Pie Crust

I have made exactly three pie crusts in my life, before this weekend. I couldn't figure out why everyone complained about pie crusts being finicky, because my three were perfect! Maybe not perfect, but they certainly were not failures. I used the same basic recipe from my Better Homes and Gardens cookbook. But looking back, maybe the pie crusts were just okay, because I definitely don't remember them being fabulous compared to the actual pecan and cherry pies themselves.

So. This weekend I decided to make homemade chicken pot pie! With a real official top and bottom pie crust (man I love crust!). All I can say is...Epic Fail. The recipe I used called for like two cubes of butter- and Shenli and I don't need that! So I tried substituting some shortening (yah, because that's better for you. not.). In short, the pie crust wouldn't even roll out, was way too mushy and butter, so I ended up dropping spoonfuls of it onto the pot pie like it was biscuit dough! Then when it baked, it never browned, it got all floury and dry, and was basically just horrible.

What did I do wrong??? I started researching pie crusts, and I realized--I did everything wrong. Warm ingredients (my kitchen is so warm that my shortening is always almost liquid) and definitely over mixing. So I decided to give in and actually try a pie crust recipe the right way. Luckily, beef empanadas were on the menu this week!

So the day before, I made the pie dough. I used this wonderful recipe and it will be my go to recipe for savory crusts now! I tried to do everything perfectly. I froze the butter before, then cut it into little chunks. I washed my hands in cold water, and I made sure the water in the recipe was ice cold. I only mashed in the butter until I had little smaller-than-pea size butter balls (I read somewhere that pie dough isn't mixed together. It's just coating the butter in flour! Weird concept). I only kneaded the dough once with my palm and then let it "relax" in the fridge overnight.

The next day I took out the dough, floured up my work surface all nice, and rolled it out thin- rolling in only one direction. I read I'm supposed to roll one way, then turn the dough a quarter turn, roll some more, etc.

Man. Can I just say, AMAZING? Even Shenli noticed how good this dough was (I baked the empanadas in the oven so they turned nice and golden brown!). It was flaky, crisp, it tasted amazing, and it truly stole the show from the beef filling. This dough was PERFECT! The pictures are horrible, but I am officially converted to pie dough the right way. Doing it the night before made it much easier- and the relaxing in the fridge was just what it needed. WOW. I can't get over it. So flaky! Thank goodness Thanksgiving is almost here because I want to try my new found pie dough skills on apple pie, peach pie, pecan pie, cherry pie, everything! (except pumpkin. ew.) This was not just a lesson of pie dough though, this is a lesson to me to learn all I can about why recipes call for the strange methods they do!


Wednesday, October 19, 2011

Recipe Review: Egg Drop Soup

We are feeling a little sickly in our home this week, so I have been searching Pinterest all day long to find new soup ideas! Once we got sick of regular chicken and noodle and cream of mushroom, I have decided to try a few new ones--maybe a french onion, pasta fagioli, and we're having chili on Friday night for the Ward Halloween Party, so that'll be great!


I have never liked egg drop soup--but I'm also not sure if I've ever had it (can you tell I was a picky kid?) Just the name egg drop turned me off from ever doing more than just dipping my spoon in once or twice at a restaurant. But in my search for soups, this one sounded so warm and brothy- perfect for our sick bodies on a cold day. Plus I had all the ingredients on hand!


I wasn't as happy with this soup as I could have been. My main problem was that the soup wasn't the burning hot warm-your-whole-body-as-it-goes-down soup I had hoped for. By the time I served it (and maybe I could time this better next time) it was just warm because the egg gets poured in after it is taken off the heat. So that takes some time. And I wanted longer egg strands. Is that possible? Oh well, I really can't complain. We just had a dinner that took like 12 minutes to prepare and we have leftovers too!


Egg Drop Soup
from Gimme Some Oven


Ingredients:


  • 4 cups good chicken broth
  • 1 Tbsp. cornstarch
  • 1 clove garlic
  • 1 tsp. ground ginger
  • 1 tsp. soy sauce
  • 3-4 large eggs
  • 1/2 tsp. sesame oil
  • 3 green onions, sliced thin
  • 1/4 cup corn or creamed corn (optional)
  • salt and white pepper to taste (I used about 1/4 tsp. each)
[We also added some shredded cooked chicken -Eliza]
Method:
Pour the chicken stock into a room-temperature pot, and whisk in the cornstarch until it is well-blended.  Add in the garlic, ginger and soy sauce.  Turn on the stove and heat over medium-high heat until boiling, stirring occasionally.
Meanwhile, whisk together the eggs in a small measuring cup or bowl.  (I find the measuring cup easier for pouring.)
Once the soup is boiling, turn off the heat.  Then while using one hand to continually stir the soup in one direction with a fork, slowly pour the whisked eggs into the soup.  (This will create the nice egg ribbons!)  Then gently stir in the sesame oil, green onions and corn (optional).  Season with white pepper (be careful) and salt (depending on your chicken broth, be generous).
Serve immediately.


Sunday, October 16, 2011

Lesson Learned: Banana Oatmeal Cookies

It's pretty much a weekly thing that I buy too many bananas and end up with "ripe" ones (why are the black mushy ones called ripe?). So I am trying to branch out of the regular banana bread and try new banana creations! These low-fat banana oatmeal cookies from Skinny Taste sounded good from the moment I saw them. The only problem? Mine. are nothing. like the picture.


I've been trying to figure out why, because I actually tried to follow the recipe exactly! I didn't have any walnuts to put in however. So the only thing I can think of (which now I am pretty sure must be the culprit) is that I just mashed one full banana into the bowl instead of measuring the 1/4 cup it calls for. But hey- what was I going to do with extra banana? How am I supposed to know how much banana equals 1/4 cup? Why would a recipe call for only part of a banana??? I know...lame excuses.

As much as I know I should have measured the banana, that's not the lesson I learned (because I will never measure banana! I refuse!) My lesson is this: if I am uncertain about the consistency of the dough before I bake it, then only bake a few to test it out! The dough did seem pretty thin (and DELICIOUS if I do say so myself). But rather than test a few, I went ahead and baked a dozen! They turned out a little something like this:

Yes, those are flat, chewy, slightly-banana-y, almost cookies. They basically fall apart in your hands! So after I messed up those dozen, I added some more flower to the Shenli batch (aka the batch with chocolate chips!). They turned out slightly better.....


But how come neither of them look like the original picture!? I am just unhappy about this. I think I might have to crumble the flat ones up and use them as ice cream topping or mix in with my yogurt. Hmm...actually....not a bad idea..... And as for the second batch, I hope I put enough chocolate chips in them that Shenli will look past the other awful flaws!


Chewy Low Fat Banana Nut Oatmeal Cookies
(Skinny Taste)

  • 1 cup all purpose flour
  • 1 tsp baking powder
  • 1/2 tsp baking soda
  • 1/2 tsp salt
  • 1/2 tsp ground cinnamon
  • 2 tbsp unsalted butter, room temperature
  • 1/2 cup sugar
  • 1/2 cup unpacked brown sugar
  • 1 large egg
  • 1/4 cup mashed ripe banana
  • 1/2 tsp vanilla extract
  • 2 cups quick oats
  • 3/4 cup chopped walnuts

Preheat oven to 350°; line two baking sheets with parchment paper or use a silpat.

In a medium bowl, whisk together flour, baking powder, baking soda, salt and cinnamon.

In a large bowl, with a mixer, cream together the butter and the sugars on medium speed.  

Add the egg, followed by the mashed banana and vanilla extract.

Working by hand, stir in the flour mixture and the oats until just combined and no streaks of flour remain; stir in the chopped walnuts.

Drop heaping tablespoonfuls of the dough onto prepared baking sheets. Bake for about 10-12 minutes, or until cookies become light brown at the edges.

Let cool on baking sheet for 3 or 4 minutes, then transfer to a wire rack to cool completely.

Store in an airtight container so you don't eat them all in one sitting!


Wednesday, October 12, 2011

Zucchini Muffins: My Experiment!

I have been researching like crazy how to substitute "healthy" ingredients into my foods. Some recipes I see are just crazy- black bean brownies? cookies without any flour, eggs, butter, or sugar? And what the heck is agave nectar? But I have also been impressed that I can cut out the butter or sugar in my recipes with simple substitutions like apple sauce and honey!

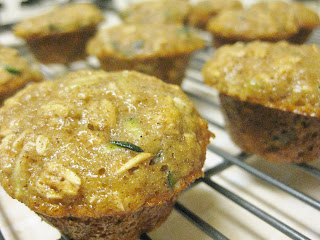
So I've made these muffins before - they are AMAZING. Moist, delicate, the zucchini gives them some depth while the lemon zest and cinnamon give a lightness of flavor. So I decided this was a good and simple recipe to try to make healthy! (Also, we just got a zucchini about 2 feet long from my sister. Yay for zucchini brownies, oatmeal cookies, muffins--anything not to use the zucchini for its real purpose!)

(photo by Eat Cake for Dinner)

When I told Shenli about my idea, he said "Wow that's great! Because I don't like apple sauce, you don't like honey, and we both hate zucchini!" Okay, so in theory, none of these ingredients are really loved at our house. But somehow, put together, they are all AMAZING! (Shenli still didn't like the muffins. But what can I say- I should have dipped them in chocolate if I really wanted his attention.)

I was afraid to substitute all the sugar for honey, because I didn't know how the batter would behave. It turned out well! Here is my (my very first!) recipe below. I had to add some more oatmeal to make the batter thicker, so it's not quite a perfect halving of the original recipe.


Healthy Oatmeal Zucchini Muffins
(adapted from Eat Cake for Dinner)

1 cup Flour (next time I might try some whole wheat in there!)
3/4 cup Oatmeal
1 tsp. baking soda
1/4 tsp. salt
1 tsp. cinnamon
1/4 tsp. nutmeg
1/3 cup sugar
1/3 cup honey
1 egg
1/3 cup unsweetened apple sauce
1 tsp. vanilla
zest from 1/2-1 lemon
1 1/2 c. grated un-peeled zucchini

Whisk together, flour, baking soda, salt, cinnamon and nutmeg; set aside.  In a separate bowl, stir together honey, sugar, egg, and apple sauce.  Add vanilla, lemon zest, and shredded zucchini. Mix together the dry and wet ingredients and stir just until combined. Add more oatmeal or flour if needed until batter becomes pretty thick.  Spray mini muffin pan with cooking spray (or use melted butter). Drop spoonfuls of batter into each muffin cup and fill to the top. Bake at 350 degrees for 12-16 minutes (the original recipe says 21-23 minutes for regular muffins if you want that instead).  Muffins will look very shiny on the top, but will still be done as long as the top is no longer doughy.


Enjoy! I looked it up online and I believe they are about 70 calories apiece, and my recipe made 21 mini muffins. They are slightly gummy for muffins- I think it might be the honey or the apple sauce. But they are delicious and filling and my first recipe adaptation was a success! I don't know if I'm quite up for black bean brownies yet, but the apple sauce instead of butter idea is my new favorite friend!

Saturday, October 8, 2011

Review: Caramel-Filled Snickerdoodles

I finally got around to making another of those four cookies I wanted to try! Caramel-filled snickerdoodles from The Baker Chick. 
(Picture by The Baker Chick)

The best part is, I think I might actually be getting better at baking! Or at least knowing how my oven works. I read up on old ovens lately, and learned that I should make sure my oven preheats fully so that the heat is well distributed--I have always just put the cold pan in the cold oven and hoped for the best! Also, putting parchment paper on my cookie sheets helps the bottoms of the cookies not burn!!

These cookies were really good. REALLY good. I love snickerdoodles, and the recipe was so simple! Baker Chick recommends using caramels that are really soft at room temperature and I can't stress that enough. Because I didn't. I just used your basic wrapped caramels (Western Family I think)....and the cookies were amazing straight out of the oven: crisp on the outside, chewy on the inside, oozing caramel and cinnamon goodness! But I just had another bite a few minutes ago of a cooled cookie. Oh dear. My jaw hurts! The caramel sure did harden up like Baker Chick said it would so I'll be microwaving every cookie we eat now. :(

On the whole, amazing! But I think I actually like my snickerdoodles without any filling. How can you get any better than the regular cinnamon-y chewy goodness! What do you think of my photography skills below? Pretty good for a little pink camera, and the only "natural light" was from the 7:00pm setting sun on a cold rainy day!

Sunday, October 2, 2011

Failure--But some Resolutions!

Is conference great or what? I love hearing the inspired messages from the Lord's servants that help me make changes in my life to be a better person!

Cinnamon Roll Review
Oh dear, where to begin? I planned to make lovely Cinnabon knockoffs Friday night, then refrigerate and bake fresh the next morning! Then....I realized I had no yeast (at 10pm, which is when I start all my yeast-needing-one-hour-rising baking projects!) So I found this recipe for no-yeast-needing cinnamon rolls! I was excited. It was so simple- just regular dough, kneed a few times, and it called for enough butter and sugar to make anything delicious.

Except that I think I ruin everything. So somehow my cinnamon rolls did not look like those lovely ones in the pictures. Mine were scrawny little lopsided rolls. But hey, I thought, they will cook okay right! Not. Maybe it was the refrigerating overnight, but they didn't puff up in the oven at all! I did mine on a cookie sheet too, so they had tons of room to not expand. The cinnamon mixture in the middle leaked out everywhere on the pan and burned, and the rolls were like...biscuits? Not the nice fluffy kind, the (made by Eliza) kind that turn out flat and dry.

But, they did at least taste good. They were cinnamony, and the cream cheese frosting makes them super yummy! The cinnamon filling did get a little crunchy from the burning in the oven....but hey. I guess the taste is all I really care about in the end. Working on presentation of my dishes is one of my goals!


Saturday, October 1, 2011

"Practically Perfect in Every Way" Omelet

Thanks to my amazing friend Kirsten, I have finally learned how to create the perfect omelet. But just because I know how to do it, doesn't mean it actually was. It was pretty good though as you can see by my artistic photo of it. Notice how the brown plate brings out the rich tones of the mushrooms...
Here's what you'll need:

3 eggs (1 entire egg and two just egg whites)
Add ins like mushrooms, green onion, shredded cheese, etc.

Instructions:

1. Cut up the mushrooms and green onions. Start cooking them in the pan on medium heat.

2. While those are hanging out, whisk the 1 whole egg with the two egg whites. You can add milk to them, just a little bit, if you want.

3. Most important step!!! Turn down the pan to a 3 or 4 (medium low) BEFORE you add the eggs. I even took the pan off the burner for a bit because the veggies were sizzling so much. This means your omelet won't be over cooked on the bottom and still runny on top. Ew.

4. Now you add the eggs and swirl them around to fill the pan. This is where you pretend to be a fancy chef who trained in France (if you want to pretend the whole time, you have to crack the eggs with one hand and chop the veggies really fast with a giant butcher knife).

Tip for swirling: don't get too crazy or else you'll have this weird flaky crust around the edge. It has a weird texture and doesn't taste very good.

5. Covered the pan so the steam cooks the top. Let it sit until the top isn't runny anymore. Then remove from pan and fold in half. Voila! The Perfect Omelet!

When you try it, let me know how it goes and if you have any tips to add. And of course I must thank my wonderful friend Kirsten for making this post possible. P.S. her blog is kind of amazing. Just sayin'.

Wednesday, September 28, 2011

Cookies, you say? And what's up this week

It was kind of a miss this weekend on the cookies. I only did two different kinds, and....well, here are the results. (I didn't take any pictures :( Shenli ate the chocolate chip ones too fast, and the lemon ones I had to freeze so I wouldn't eat them all by myself!)

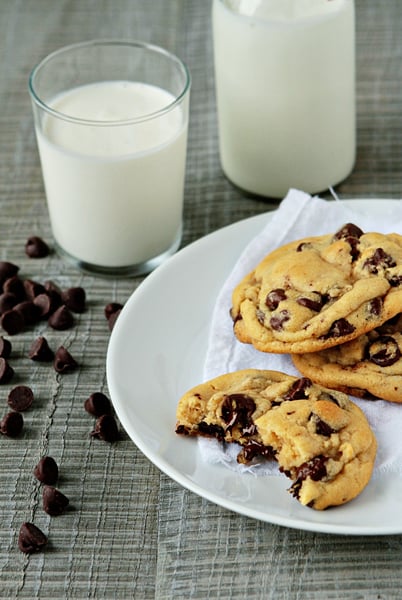
Chocolate Chip Cookies: I ended up using this recipe, because Shenli didn't like the look of the NY times ones. I didn't put snickers in, I just did chocolate chips and a few with toffee bits as well. So this one had browned butter- which should make things DELICIOUS! And yes, it was quite delicious, but also odd. The dough was horrible cookie dough (and I am definitely a cookie dough person!). It had a weird taste because of the browned butter, and I had to add about an extra 1/2 cup or more of flour because the dough was way too sticky. It wouldn't even hold together in a ball on the cookie sheet! So the actual cookies were okay. Very soft, and not that unique. I think I like browned butter for muffins/zucchini muffins (these were so good!), but for cookies, I just like the regular old soft butter way! So, we will have to experiment with other cookie recipes!

The Lemon cookies were AMAZING though. The dough was perfect- like lemon sugar cookie dough. The cookies came out crisp on the outside but chewy on the inside. I loved them- Shenli wanted to know where the chocolate chips were! But to stop myself from eating them, I had to freeze them. To enjoy at a later day I suppose....whenever that will be....

All in all, it was okay. But I'm looking forward to trying a new chocolate chip recipe, and also the caramel snickerdoodles sometime!

For this week's recipe....I'm definitely thinking cinnamon rolls. Because it's conference weekend of course! My family has always done cinnamon rolls for conference. I've wanted to branch out with my family- maybe start a new tradition! So I debated about crepes with fruit and homemade whipped cream or something, some kind of waffles (like cinnamon apple! yummm), muffins, homemade donuts (baked probably, not much of a frier). But Shenli vetoed all those ideas (well...he just didn't seem that enthusiastic about them. haha.) So we're back to cinnamon rolls. But I am going to try a new variety! Probably either these ones from The Pioneer Woman,

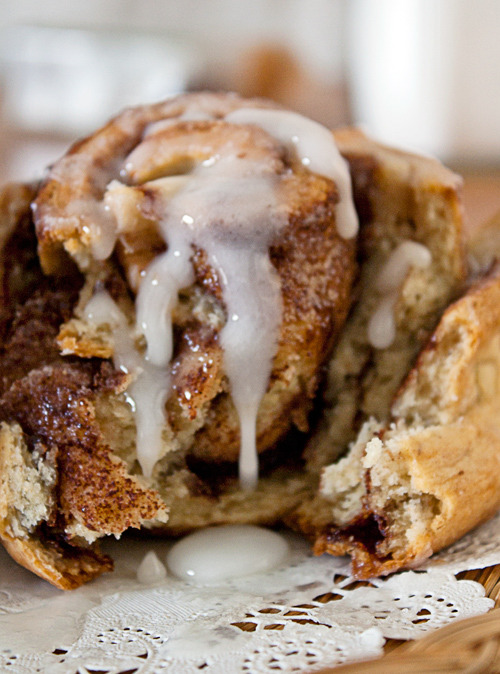
or these ones that promise to be like a cinnabon! From The Girl who Ate Everything
Or finally maybe these ones, which would take less than an hour! They are from Ounces and Grams. 
We'll have to see what I'm in the mood for. I love cinnamon rolls! And having them for breakfast is one of the things that makes conference weekend my favorite!

-Eliza


Wednesday, September 21, 2011

Cookies x3

So, I can't bake very well. It's partly my tiny old oven: I think the temperature is off, it doesn't fit a full size cookie sheet, and the heat is definitely not even. However, a lot of it is me too. I tend to overcook things A LOT and I have one major flaw: I like to skimp on ingredients. Sure it's a recipe I've never tried, but does it really need this much butter? sugar? flour? caramel? I like to skimp because I want to save the ingredients. So I can use them for other recipes! So what do I end up with? Recipes that fail and are waaay dry because I want to "save" for better recipes. Oh dear.

So I have made a resolution. I will use what the recipe calls. Maybe MORE! If I'm feeling indulgent. :) And to kick off my new resolution, I am going to try some new cookie recipes. I'm not sure if I'll do all of them, or just one or two, but these are the ones that sound good to me right now!

1. Lemon Crinkle Cookies. Don't these look AMAZING? So light and chewy and soft and lemony!
2. Chocolate Chip Cookies: I am searching for the perfect recipe. I might also try putting caramel inside these, or candy bars like reeses or twix or snickers. So yummy! Plus Shenli just loooooves chocolate chip cookies.


3. Caramel-filled Snickerdoodles: These look so good to me. PLUS I still have caramels left over after I skimped on caramel brownies last week. Hah. So I will use up those caramels making delicious snickerdoodles. I think snickerdoodles are actually my second favorite cookie, right after peanut butter cookies!

4. (Okay I know I said 3.....but I love cookies!) Praline Cookies: These have also looked good to me lately, they just look light and like it says in the blog post, they look like they would melt in your mouth! They might not happen this weekend, but eventually they will be on the menu!


Have a great week--I know I will be looking forward to the weekend! -Eliza

Sunday, September 18, 2011

Eliza's Recipe Results

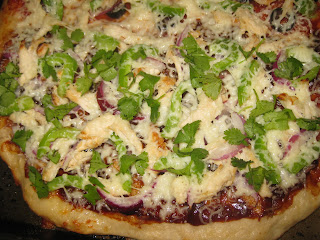
Oh, wait. You didn't know that I was making barbecue chicken pizza this weekend? How weird. Are you sure you checked the blog to see our recipe intro? Hm.....oh yah. That's because I forgot to post it! Silly Eliza. So anyway, I made barbecue chicken pizza this weekend on homemade pizza dough. The pizza is this recipe and the dough was this one.

Okay. So how did it go? Pretty well I guess. Shenli and I both like deep dish pizza better than thin crust, so I was hoping this pizza dough would be pretty thick.....and it was. Probably too thick- it overpowered all the other toppings/sauce/cheese/cilantro/everything! But the dough did taste good!

As for the toppings, it was also just pretty good. I used our favorite barbecue sauce, added shredded chicken, green peppers, purple onions, mozzarella cheese, and cilantro on top. It was just a basic barbecue chicken pizza- not anything spectacular. I think I needed more bbq sauce, and DEFINITELY more mozarella cheese. It always looks like so much cheese until it bakes!

I only made about 1/3 of the pizza barbecue, because we didn't have that much sauce. The rest was pepperoni and chicken with olives and green peppers. That was also pretty good. I think in general, I am just more of a regular red sauce, pepperoni, olives type pizza person. But that's okay. It was good to try something new! Will I make it again? Nah. But I have other recipes for chicken cordon bleu pizza AND hot wings pizza. Those will definitely happen someday!


Wednesday, September 14, 2011

Alexis' Recipe Results

Okay, so I didn't take pictures of my monkey muffins, but I did do them twice! I really like this recipe because it was so easy. You just eyeball everything and you figure out how you like it.

For the first try, I followed the recipe to the letter and it turned out well. I just used Pillsbury biscuit dough and was too impatient to let it rise. I pulled the biscuits in half, rolled them into balls, and stuck four in each muffin round. Once they were done baking, I immediately poured a spoonful of sweetened condensed milk on each. They were decent; you can't mess up these monkey muffins!

For the second try, I used brown sugar instead of white sugar. Definitely do that! I put only three dough balls in the rounds instead of four--much better. The sugary, buttery goodness was able to coat more of them. Another alternation: when I poured the spoonful of the sweetened condensed milk on the muffins, I slightly separated them with the spoon. This way, the sweetened condensed milk was able to soak inside the dough. Oh that was good!

The second try was by far the better way to go. I wish I could have tried Eliza's brown sugar glaze. You know you're sisters (and foodies) when you substitute the same ingredient!

Sunday, September 11, 2011

Eliza's Recipe Results

So, monkey muffins are SO GOOD! How can they not be good when the only ingredients are butter, sugar, cinnamon, bread dough, more butter sugar and cinnamon! Wow.

So I had leftover bread dough from this recipe when I made BBQ sandwiches yesterday. It made 7 monkey muffins which was perfect! I didn't have sweetened condensed milk, plus I don't really like soggy bread things, so instead of pouring that over the finished muffins, I melted some butter and brown sugar and poured that over the finished muffins. It was perfect! Definitely gave the muffins the traditional monkey bread taste.

The muffins were a bit drier than the original recipe probably would have been (Alexis did the sweetened condensed milk I think, so I'm excited to see how hers turned out!) but I really liked them! Definitely something I will make again.


Wednesday, September 7, 2011

Recipe of the Week: Monkey Muffins

In my home economics class in 7th grade I was introduced to Monkey Bread. Since then, I've been hooked. I've always wanted to try it again, but I never got around to it. Recently I came across this muffin variation, which looks even easier than the original! There is no mixing involved. None! And you get even more of the crispy outsides. Thank you Pioneer Woman for reinventing the classic Monkey Bread!


Monkey Muffins


INGREDIENTS:
Leftover Bread Dough (or Refrigerated Biscuit Dough, cut into thirds)
Butter
Sugar
Ground Cinnamon
Sweetened, Condensed Milk

PREPARATION INSTRUCTIONS:

Preheat oven to 375 degrees.

Add 1/2 teaspoon butter to muffin tins. Sprinkle in sugar and cinnamon.

Roll dough into walnut sized balls (or cut refrigerated biscuit dough into thirds). Place three into each muffin tin.

Top with 1/2 teaspoon butter. Sprinkle on more sugar and cinnamon.

Allow dough to rise, if applicable, or just go ahead and bake for 15 minutes, or until golden and bubbly.

Remove from oven and immediately drizzle plenty of sweetened condensed milk over the top of each one. Be generous! Allow rolls to sit for a little while to absorb sweet, sticky milk.

Scoop out with a spoon and serve to hungry humans.